


Fermentation: Transform and Preserve Your Produce
- Nea Talbot
- Feb 9, 2025
- 9 min read

Updated: May 28, 2025

The thought of using bacteria to create your food turns many people off at first. The most common initial reaction I get when chatting with people about fermentation is that they love it, and they get it, but they could never make it themselves because what if something goes wrong and they get sick? You mean I’m supposed to leave it at room temperature for days for bacteria to take over? Well, yes. And once you know the basic background and simple processes to create the right environment for the bacteria, it’s on! You will be transforming produce from nutritious, but not fully bioavailable sustenance, to fully available and enhanced nourishment.
We all probably know that fermented foods go back thousands of years. Evidence has been found of fermented foods in the diets of people from 10,000 years ago, where the development of agriculture and domestication of livestock led to a strong supply of meat and milk, leading to the creation of cheese in China and yoghurt in Bulgaria. Fermented beans and cereals were not far behind. The lack of refrigeration and the co-evolution of microbes and plants made for some inevitably successful experiments. From then to now, we have only increased the variety of fermented foods all over the world, and now we have tons of scientific research to back up what our ancestors already knew.
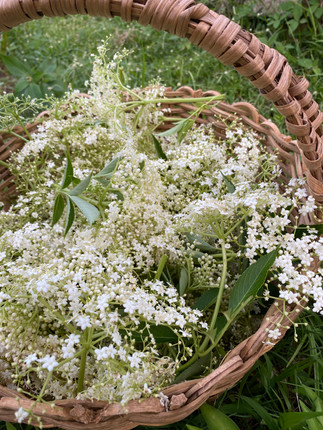
A good part of my family comes from German immigrant roots, so sauerkraut was always spoken of in my house, but we never made it. I think maybe the tropical heat and the distance from our family made my mother a little hesitant to introduce it. But since I spend most of my days in the kitchen, and with plenty of things from the garden, I eventually came around to trying out simple recipes, until now you will find two, three, four or more fermenting projects on my counters or in the fridge. The heat of the tropics just makes it that much more efficient! I can get done in a couple of days what northern fermenters could take a week or more to accomplish. The trick is experimenting and finding out what you like. The fun is that the exact same recipe will act differently for all of us and we all love the results at different stages. The magic is that you are introducing local micro-organisms into your gut microbiome as well as making the plant’s inherent nutrition more available for your body to absorb.
When we are born, our gut is first colonised by microorganisms through our mother’s breast milk. From there, it is up to us to maintain and improve the gut microbiome through a varied diet rich in whole foods, and especially those fermented foodstuffs. The benefits of fermented food goes beyond probiotics. Yes, ferments are full of them, especially things like kefir, yoghurt and kombucha. But here I am working more with vegetable-based ferments. While they do contain plenty of probiotics, that is not their only benefit. We all know the vitamins and minerals we get from fresh produce is essential to our well-being, but the reality of how much actually gets absorbed by our bodies can be quite disappointing. When we ferment produce, one of the first and most important things that happens is that sugars convert to lactic acid. Not only does this mean we are consuming less sugar, but we are consuming more lactic acid which means we are consuming more probiotics and supporting a healthy pH. The fermented vegetables are also broken down at a cellular level making things like vitamin B9, B12 and C, as well as minerals like iron, more available for absorption by our bodies. Interestingly, vitamin B12 does not occur in plants themselves but is produced by the bacteria within a ferment. Fermenting vegetables also increases the amount of antioxidants found within them. Then, there is a third amazing thing! We all know probiotics, but there are also postbiotics. Postbiotics are substances produces by probiotics that are beneficial to us specifically, such as enzymes, peptides, vitamins and fatty acids. This is great news because in fermented foods that are heated, such as sourdough bread and anything you buy that has been heated for shelf stability, the probiotics are killed. However, you are still getting all the good postbiotics. There is a third ‘biotic’, the prebiotic. These are not necessarily a specific benefit of ferments. Prebiotics are the food that probiotics need to survive, but they are found in the plant fibers of the vegetables we ferment. Fermentation not only makes these fibers easier for us to digest, but it allows the probiotics better access to their meal.


There are many specific types of fermentation with a lot of different end results, but that’s a bit more than what we’re here for. I love to wild ferment as it’s the easiest and most common method, so let’s get your hands in the crock!To begin working with fermentation, it helps to understand the basics of what’s going on inside that crock or jar. Here, we are working with wild fermentation and thus focusing on lactic acid bacteria. The necessary bacteria for wild fermentation (lactobacilli) are found on the produce itself, of course the best to choose is homegrown and organic, but store bought will do as well. When we give the lactobacilli the right conditions to multiply, they easily outcompete other less desirable species. Lactobacilli create their energy by digesting sugar under anaerobic conditions. Their waste product is organic acids and these are what preserve your food. The pH is lowered and harmful bacteria cannot survive. Once you know how to host these little creatures, they will happily do the work for you.
A few basic things to keep in mind for creating this environment are;
Increased surface area. Finely chopping or slicing your veggies creates more space for the salt to interact with the plant’s cell structures as well as releases more sugars for the lactic acid bacteria to feed on.
Know your salt ratio. Bacteria are doing the work of driving the ferment, but the salt is the steering wheel. The salt draws out the vegetable’s liquids to create a brine. This is necessary as the lactic acid bacteria only thrive in an anaerobic environment. Salt also hardens pectin within the vegetable, which is why ferments often have an excellent crunch. Salt also makes things taste good! A good ratio to keep in mind is 1.5% salt to the weight of produce, but this can vary.
Temperature and light. Ferments like to live in around the same temperature range as humans. Too cold and the ferment won’t happen. Too hot and the bacteria will die off. I find in our tropical region, I need 3-5 days to reach desired sourness. Light won’t harm your ferment too much, but it can raise the temperature too much. I keep mine out of direct sunlight but where I can easily keep an eye on it.
Air. Lactic acid bacteria thrive in anaerobic conditions. Harmful bacteria thrive in aerobic conditions. It’s important to keep your ferments under a brine. This can require adding a little extra when needed, or just making sure your weight is heavy enough and push it down again if needed during fermentation.
Burping. Not you. Your jars. Ferments bubble and release CO2, which will build up and can cause some exciting moments. I keep the lids secure, but not too tight, and open them a little every day to release any built up gases.


Now I think we’ve covered enough of the facts. Enough lecturing. Eat fermented foods. Live longer. Let’s get to recipes!
The most common response I get when discussing making fermented foods at home is a fear of eating or drinking something that will make you sick. Fermented food is the result of bacteria. It’s not a huge leap to associate this with food spoilage and a bad case of a stomach bug. But it’s actually kind of difficult to mess up fermentation, as it is a simple and natural process, and it’s very easy to tell if something has gone wrong. It’s hard for me to pin down a fermentation recipe, as the timing can vary so much based on temperature, but once you do it once or twice, whether right or wrong, you’ll be able to differentiate on what should and should not be happening in your unique space. A fermentation gone right will smell sour and aromatic and get more complex with age. You can choose at what stage you like it. Gone wrong, it will stink. A white film on the top (only on the top) is quite normal. Although it resembles mold, this is Kahm yeast and a little can be stirred into your ferment, a lot can be skimmed off. It is entirely harmless. Any other color, (green, blue, pink, yellow, or a white that grows down into your ferment, not just on top) discard your ferment and start again. This is easily avoided by using clean vessels. Don’t stress! You’ll know if something has gone wrong, but most likely, very very likely, it will have gone right and you are on your way! Now let’s get you started.
Recipes
Fermented Chili Paste

This is one of the quickest and easiest fermentation recipes, as well as an excellent way to make use of too many hot peppers! I make a big batch of this ferment once a year and use it straight in my meals or as the base for a variety of hot sauces. Cayenne chilis are my favorite but I also use wild bird peppers for this recipe. I find that after a year, the flavor of this chili paste is incredible. It moves from the astringent, eye watering heat of fresh chilis to a deep, smoky and rich chili flavour. None of the heat is lost, but the flavors become much more complex and the character of the chilis you choose really shine through. Try it with jalapenos or whatever you have to explore the different flavor profiles! You can work with any weight of chilis once you follow the 1.5% salt to weight of produce rule. So for one pound of chilis (16 oz) you would use 0.24 oz of salt.
1 lb chilis
0.24 oz salt
Roughly chop chilis and toss with salt. Pack tightly into a jar. Let the jar sit for 1-2 days and let the chilis release their brine.
After 1-2 days, transfer chilis and brine into a food processor and pulse until a fine paste is formed. Transfer paste into a clean jar. Leave enough head space for the brine to rise, this will depend on the size of your jar.
Leave it out of direct sunlight but where you can keep an eye on it. Stir once a day and recover loosely. Do this for 1-2 weeks and then move it to the fridge. That’s it!
Tepache

Tepache originates in Mexico and is a really fun way to make use of pineapple scraps. Because you are using the rind of the fruit for this recipe, I highly recommend using the best organic fruits from a trusted source. Don’t be afraid to play around with this recipe, using your own combination of spices or adding in some fresh herbs like mint or lemongrass. This is best served ice cold on a hot afternoon. It can contain alcohol, so don’t serve it to your kids!
1 ripe pineapple
3-4 quarts water
1 cup brown sugar
1 stick cinnamon, a couple cloves, allspice berries and star anise
1 dried chili
Wash your pineapple and eat the delicious fruit, saving back the rind and core.
Combine all of the ingredients in a large container and stir until the sugar is dissolved. A little hot water can help with this but let it cool before adding to the mixture.
Cover securely with a clean towel and watch the bubbles happen! Once it is actively bubbling, usually 2-3 days, strain the ferment, bottle it, and refrigerate it.
This is best consumed within a week or so. Remember to burp the bottles if you do not consume immediately. Don’t wait too long to enjoy this, but if you do then you have made yourself tepache vinegar!
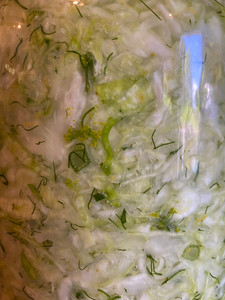
Basic Sauerkraut
Sauerkraut is one of the easiest vegetable ferments to work with. I find it great to start with this recipe as it teaches you what to look for throughout the process, what flavors you like, and it’s easy to add your own twists to it. I also love this recipe because cabbage is so often overlooked as an interesting part of our diet.
1 lb cabbage
2 tsp salt
Finely slice your cabbage using a knife or a mandolin. Save back a few of the whole outer leaves. Toss the sliced cabbage with the salt in a large, nonreactive bowl. You can massage the salt into the cabbage with your hands, but I prefer to use my Kitchenaid mixer with the dough hook! Massage by hand for about 5 minutes or with your mixer for 1 minute. Transfer the cabbage to a large glass jar or crock. Press down as firmly as possible with a tamper or other flat bottomed object. The brine should start to rise and cover the vegetables. Cover the vegetables with the whole cabbage leaves and on top of that place a weight. This can be a ceramic crock weight, plastic bag or jar filled with water, a sterilized stone or whatever else works for you that is sterilized. Cover with a cloth or loose fitting lid and leave at room temperature, out of direct sunlight. Now, leave it and let the magic happen! If the vegetables rise above the brine, tamp down again. Do not secure the lid too tightly, and burp once a day. In the Caribbean, I let mine ferment on the counter for 3-5 days, but up to 1 week is fine, then refrigerate.
